Mark a Grid Row Entered in Error
Mark Assessment Entered in Error
Mark an Open Assessment Entered in Error
Mark a Closed Assessment Entered in Error
Mark a Grid Row Entered in Error
Any grid entry in Assessments can be modified or marked Entered in Error, unless the Assessment has been closed or end dated.
Mark Assessment Entered in Error
The following are reasons why an assessment must be entered in error:
- Incorrect Assessment type was selected and saved
- Logged or copied Assessment to incorrect client
- Assessment is attached to wrong Referral
- Assessment was logged or copied twice (or more)
NOTE: The Assessment marked as Entered in Error will not be included in reports/statistics.
If the correct copy of the Assessment is Required,
- Copy the Assessment, note the Assessment ID of correct and incorrect Assessments
- Unique Assessment ID's are on the Details (or first) page of the Assessment
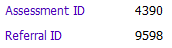
- You can also use this information to troubleshoot whether the Ax has been linked to an incorrect referral as all referrals also have a unique ID number which you will find in the bottom left hand corner of the Details section of the referral.
IMPORTANT: In the new correct copy of the assessment: Date Started should reflect the actual date the Assessment was done. In other words, the correct Assessment should be the same as the Date Started on the incorrect Assessment.
Mark an Open Assessment Entered in Error
Step One: Mark the incorrect Assessment
1. Copy the Assessment if appropriate and note the ID of the “good” Assessment
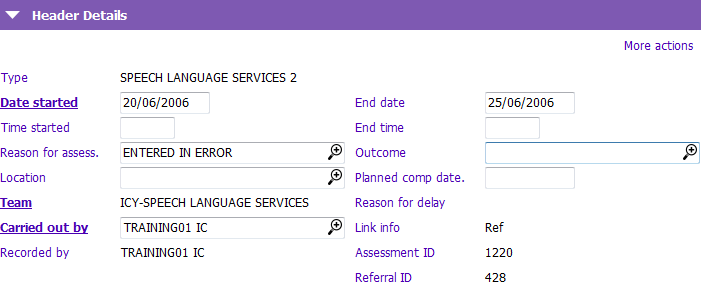
2. In the incorrect Assessment, update the Carried out by field:
-
Carried out by: Complete field and Save; note the Assessment ID.
3. Update the following fields in the incorrect Assessment:
- Reason for assess.: Type EIE (Entered in Error) and tab out
- End date: Enter a date. MH Assessments
4. Click on the  button in the Assessment toolbar
5. Enter the following text in the casenote:
- Entered in error – see Assessment XXXXX (ID of good Ax)
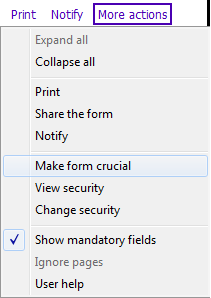
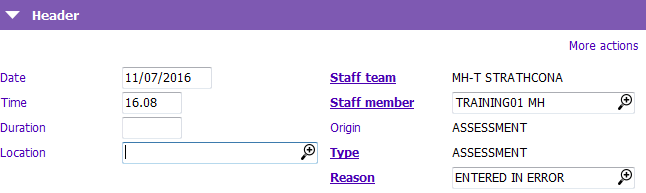
6. Click on More actions below the Assessments header at the top of the page

7. Select Make form crucial. The Crucial information - make item crucial? window will appear

8. Type into the notes box, “Entered in Error, see Assessment XXXXX". Click Accept Changes. The assessment form will turn yellow.
Step Two: Change the Casenote Reason
1. Click on the Casenotes Application
2. Open the casenote you created from Assessments
- Reason: Change from “Assessment” to "Entered in Error"

3. Press F12 to Save
Mark a Closed Assessment Entered in Error
Step One: Mark the Incorrect Assessment
1. Copy the incorrect assessment if you need to create a corrected assessment.
2. Take note the ID of the “correct” Assessment.
3. Open erroneous Assessment.
4. Click on the  button in the Assessments toolbar.
5. Enter the following text in the casenote:
- Entered in error – see Assessment ID (enter ID of the correct Assessment).
6. Click on More actions below the Assessments header at the top of the page.
7. Select Make form crucial. The Crucial information - make item crucial? window will appear.
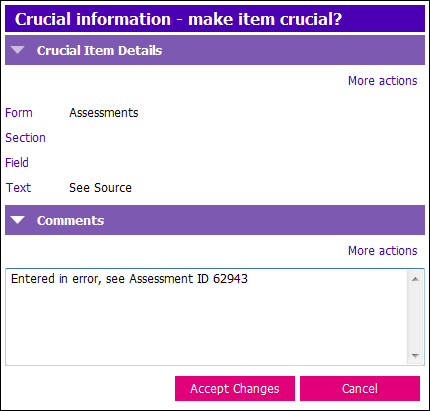
8. Type into the notes box, Entered in Error, see Assessment ID (use ID of correct assessment).
9. Click Accept Changes. The assessment form will turn yellow.
Step Two: Change the Casenote Reason
1. Click on the Casenotes Application
2. Open the casenote you created from Assessments
- Reason: Change from “Assessment” to "Entered in Error"
3. Press F12 to Save