1. Click on the Group Charting Application.
2. Click TICK TO START (SELECT A GROUP) and choose the appropriate group from the 'Groups for current user' window:
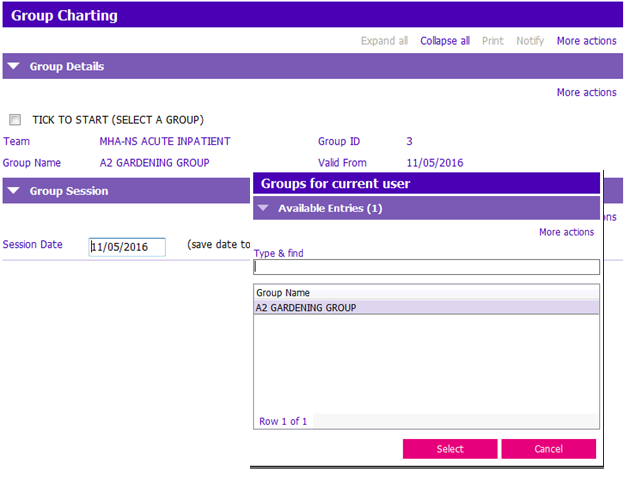
3. Enter the date of your group session in Session Date field.
4. Press F12 to Save.
5. Enter a Session Note. This is the group note that applies to all clients in the group and should not contain the individual client documentation.
6. Tick all clients that were present at the group session to document attendance.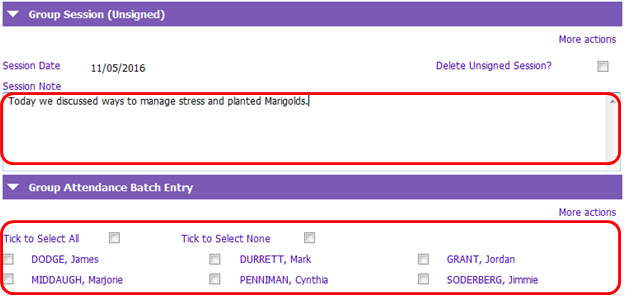
7. Press F12 to Save.
8. Select the client in the Group Attendance grid to chart the individual note on the client chosen.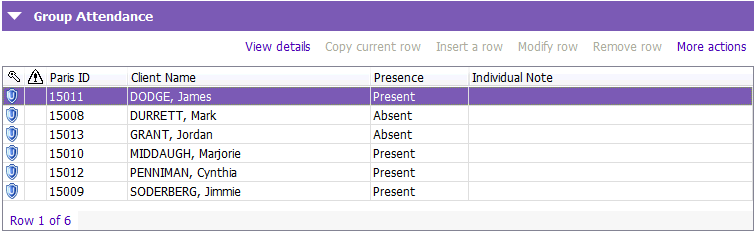
9. Verify ‘Client Attendance’ is accurate. If client was absent from the group session, you may specify ‘No Show’ or ‘Cancelled’ using the appropriate check boxes. Otherwise, if this is an attendance only drop-in style group, leave attendance as absent.

NOTE: If “No Show” or “Cancelled” are not selected, the client is considered “Absent” and no casenote will be created by default (even if there is a session note). However, if an individual note is written for an “Absent” client, a Group Note casenote will be created for the client with the casenote reason “Group Note” so that information is not lost.
|
Attendance |
Casenote created if: |
Casenote Type |
Casenote Reason |
|
Present |
Session AND/OR individual note |
Group Note |
Group Referral Reason |
|
Present |
Attendance only (no notes) |
Group Attendance Only |
Group Referral Reason |
|
No Show |
Session AND/OR individual note |
Group Note |
No Show |
|
No Show |
Attendance only (no notes) |
Group Attendance Only |
No Show |
|
Cancelled |
Session AND/OR individual note |
Group Note |
Cancellation |
|
Cancelled |
Attendance only (no notes) |
Group Attendance Only |
Cancellation |
|
Absent |
Individual note |
Group Note |
Group Note |
|
Absent |
Only session note |
NO CASENOTE CREATED |
NO CASENOTE CREATED |
10. Type specific client information about this session in the ‘Individual Note’ text box.
NOTE: If you are splitting the charting with another clinician, type your initials at the end of your documentation for each client.

11. If necessary for MRR purposes, Tick if suicidal/self harm is raised in the group session. Follow current clinical practices and referral process for clients who identify suicidal concerns.
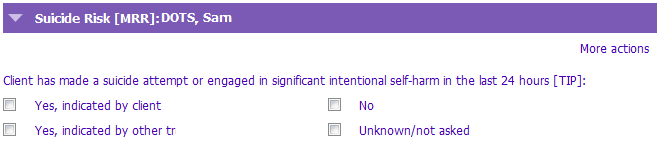
12. Repeat steps 8-11 as required to chart on the individual group members.
13. Verify that all charting is accurate and complete. If you are splitting the charting with another clinician, ensure all clinicians have completed their document for this group session before you proceed to the next step.
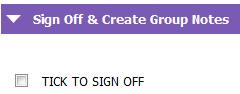
14. Tick ‘Tick to Sign Off’. The group session must be signed off for the group case note to appear in the client’s chart (NOTE: Only one name may be attached to the documentation).
15. Press F12 to Save. Once documentation is saved, case notes will be created in the clients’ individual PARIS record. To review documentation, please use the client’s case note module or print relevant reports.